Unity
Before You Begin
To integrate the Bidease SDK, you need an active publisher account on the Bidease Monetize platform.
Prerequisites:
- Supported Unity versions: Unity 2022 LTS or Unity 6000
- Minimum Android SDK:
23(Android 6.0) - Target Android API:
35(Android 15.0) - Unity 2022 builds only: JDK 17 installed on the build machine. Unity 6000 bundles a compatible JDK.
1. Switch Build Platform
Open File → Build Profiles and switch the active platform to Android.
2. Verify Mediation Plugin
Install the Google Mobile Ads Unity plugin via the Unity Package Manager (or by importing the .unitypackage). Make sure the plugin is up to date and that your AdMob App ID is set in Assets → Google Mobile Ads → Settings.
3. Configure Player Settings
Go to Edit → Project Settings → Player → Other Settings and verify:
- Minimum API Level is set to Android 6.0 (minSDK
23) or higher. - Target API Level is set to Android 15.0 (API level
35) or higher.
4. Import the Bidease Adapter Package
Download AdMob AdapterIn Unity, go to Assets → Import Package → Custom Package… and select the downloaded file. Import all included assets.
After import, verify that the following files are present in your project:
Assets/BideaseAdmobAdapter/Editor/BideaseDependencies.xml— dependency manifest that pulls the required Android libraries:
<?xml version="1.0" encoding="utf-8"?>
<dependencies>
  <androidPackages>
      <androidPackage spec="com.bidease:bidease-mobile:2.2.2"/>
      <androidPackage spec="com.bidease:admob-adapter:2.2.2"/>
  </androidPackages>
</dependencies>
Assets/BideaseAdmobAdapter/BideaseAdmobBridge.cs— C# bridge used to callSetInitParamsfrom your Unity scripts.
5. Configure the Java 17 path Unity 2022 only
Install JDK 17 on your machine and point the adapter at it using either option below.
Option 1 — From the Unity Editor
Open Edit → Preferences → Bidease Settings → Build Environment Paths and set Java 17 Path to the absolute path of your JDK 17 install.
Option 2 — From the command line (CI)
Create a one-line text file with the JDK 17 absolute path:
/absolute/path/to/jdk-17
The Editor UI writes this same file, so the two options are interchangeable. If the path is missing or wrong, the Android build fails with [GradlePreprocessor] JAVA_HOME is not set in the Unity console.
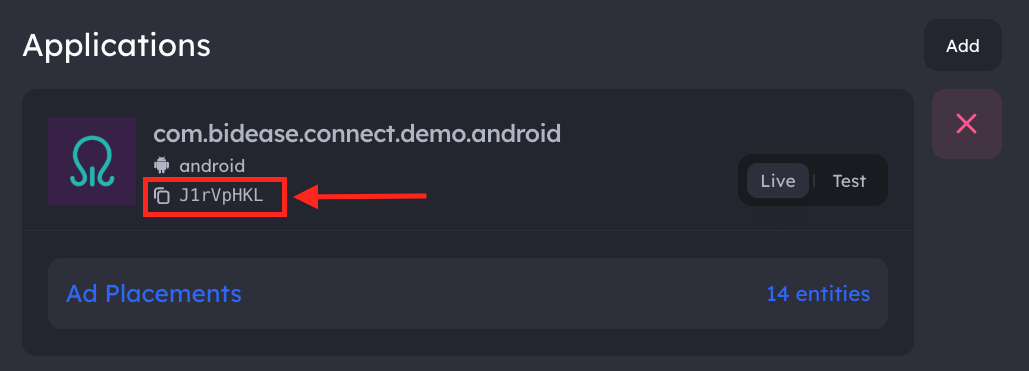
6. Set your App Key
Your App Key is available in the Bidease Monetize dashboard:
- Log in to your account at monetize.bidease.com
- Go to Applications
- Open the required application
- Copy the App Key
Call SetInitParams before initializing the Google Mobile Ads SDK:
BideaseAdmobBridge.SetInitParams("YOUR_APP_KEY");
MobileAds.Initialize(initStatus => { });
SetInitParams also accepts an optional customProps dictionary: BideaseAdmobBridge.SetInitParams("YOUR_APP_KEY", new Dictionary<string, string> { ["ipv4"] = "203.0.113.17" }). Privacy signals are sourced from MobileAds.RequestConfiguration at ad-load time and aren't configurable from the Unity bridge.
YOUR_APP_KEY with the App Key from your Bidease Monetize dashboard.The Bidease SDK initializes automatically when AdMob triggers the mediation adapter — no additional init call is needed.
7. Configure the Mediation Dashboard
Follow the step-by-step instructions for adding Bidease custom events in AdMob mediation: Add Custom Events in AdMob Mediation →
Before configuring AdMob, set up your application and create your first test placements in the Bidease Monetize UI. Monetize UI setup guide →
8. Test Mode
Option 1: Enable via Code
Add the test-mode Android package to your BideaseDependencies.xml:
<?xml version="1.0" encoding="utf-8"?>
<dependencies>
  <androidPackages>
      <androidPackage spec="com.bidease:bidease-mobile:2.2.2"/>
      <androidPackage spec="com.bidease:admob-adapter:2.2.2"/>
      <androidPackage spec="com.bidease:bidease-mobile-test-mode:2.2.2"/>
  </androidPackages>
</dependencies>
Option 2: Enable via Dashboard
- Go to Applications and open the required app
- Navigate to Test Devices and add the devices you want to test on — use GAID (Android Advertising ID)
- Enable Test for the application
QA Checklist
- Test Mode provides nearly 100% fill — expected behavior for QA only.
- Disable Test Mode before submitting your app to Google Play.
- Ensure GAID is available on your test device so the Bidease team can review logs.
- If you run into any issues, contact your Bidease account manager.